C2_Use Jpype+LibGDX to develop a game in EN
Le 日 05 四月 2026
按照上一篇所说,我会在这一篇中,较为详细的说明,如何使用Jpype+LibGDX这样的技术栈进行一些开发。注意,我不建议你把它用在生产中,但是你都固执到想要用Python配合LibGDX开发了,估计也不是在生产环境中了。如果哪位大佬看见了,还请不要笑话我,这是我带有“什么都要用Python写”的执念的时候搞出来的东西。
As the last artical,I will detailed introduce how to use Jpype+LibGDX on developing.What should be noticed is that I don't think you should use this in any production environment.But you were so stubborn that you want use LibGDX with python,so I can assume that you were not in production environment.And please don't laugh at me,this thing was born at the time I want to use python write everything.
而且这个技术其实很简单,本篇只是修正LibGDX官方文档中已经过时、错误的信息。那么我们首先从Jpype开始。
This technology was very simple,this blog is just for introduce a way that more suitable for python programmer to use LibGDX.And I use an old version of LibGDX in this tutorial,the code will be deiffernt if you use the latest version.Okay,we start with JPype.
Jpype是一个允许Python引用Java包,调用包中的函数,或者实现包中的接口的库。你可以用这个来安装它:
Jpype was a library that allow you import Java package,call function in the package or implement interface in the package.And yes,it can't extend classes,so you have to deal with something by yourself.You can use this command to install it:
pip install JPype1
在使用它之前,请确定你的机器上已经安装了JDK,并且配置了JAVA_HOME环境变量,需要注意的是,在一些资料中提到需要安装与python位数相同的JDK,比如64位Python需要安装64位JDK。如果都完成了,那么你可以打开交互式环境试一试:
Before start to use this library,please confirm that you have install JDK on your machine,and correctly config JAVA_HOME environment variable.If you think you were finished,you can try it in interactive environment:
>>> import jpype

>>> jpype.startJVM(jpype.getDefaultJVMPath())
>>> jpype.shutdownJVM()
如果一切正常,理论上应该没有任何报错。如果有错误的话,请确定你的JVM安装路径是否已经添加在环境变量中,如果真的解决不了,劳烦您上必应搜(我真没遇到过除环境变量外的问题,我也没有办法帮忙,对不起)。正常后,我们进行下一步。我们需要得到一些LibGDX运行所必须的包,我暂时没有发现任何已经构建好可供下载的包,所以你需要自己构建。当然,你如果愿意使用古老版本的LibGDX,你可以从我的上一个项目AKDW的Jars目录中复制过来。如果你需要更新的版本,首先使用官网的gdx-liftoff来获得一个GDX项目。然后用gradle构建它,并且需要构建成功,起码你得要让初始场景跑起来。如果遇到gradle构建失败,比如无法下载gradle,你可以试着换源,或者更干脆一些,直接把对应的gradle包下好,丢到它应该去的地方,比如全局gradle目录或者该项目的gradle目录中。然后进入你的全局Gradle目录中找构建好的包,在Linux中,它们通常在这个目录中:~/.gradle/caches/modules-2/files-x.x(此处x为数字,windows用户们对不起了,我常用linux,真不知道windows的在哪,您可以去搜gradle的包的保存路径),在这里你可以看到一些有熟悉的名字的目录,比如org.lwjgl,接下来,你只需要在这里面找到一些文件即可。
If everything was good,it shouldn't have any error.If there were any error,please check whether your JVM install path was added in environment variable.If this can't solve the problem,please google(I haven't met any problem without the variable problem,so I can't help,sorry).When it worked,we need to get some package that we need.I didn't found any package that you can download directly,you need to search it in the caches of gradle.Or,if you don't mind use the old version,you can get those packages from my last project[AKDW](https://github.com/hhhhh322/AKDW) in the Jars floder.
你可以对着以下提到的包找,但是其实可以只找其中的gdx-x.xx.x.jar,然后一边看运行的报错一边找,这样你的包会是最小可以运行的,不会有一些多余的。以下提到的也不一定都用的上,因为已经太久远,我曾经添加过多次包,必要的包是哪些我已经不记得了。
你需要注意的是,带有natives字样的包,大多都是平台特化的,所以你需要想好目标平台,或者干脆都复制过去,按需引入。你需要找到的文件如图:
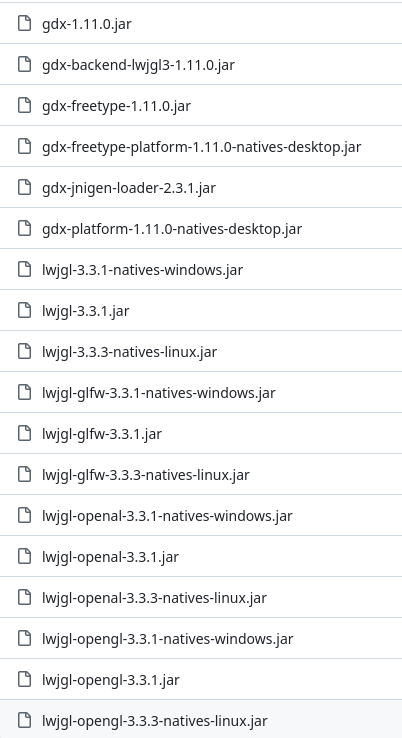
在找到你需要的文件后,在你的项目中创建一个Jars目录,丢进去,你就可以开始尝试编程了。你可以先尝试下面的代码,请不要完全复制,这里的版本应该和你的不一致,并且更新版本的LibGDX的启动代码和此处的已经不太一样了,这是老写法,如果需要,请尝试将官方Java文件翻译为Python,只要不涉及继承Java类,都是可以运行的。:
import jpype.imports
from jpype import JImplements, JOverride

# 基础的Jar包
BaseJar=['./Jars/gdx-backend-lwjgl3-1.11.0.jar','./Jars/gdx-1.11.0.jar','./Jars/lwjgl-glfw-3.3.1.jar','./Jars/lwjgl-3.3.1.jar','./Jars/gdx-jnigen-loader-2.3.1.jar','./Jars/gdx-platform-1.11.0-natives-desktop.jar','./Jars/lwjgl-opengl-3.3.1.jar','./Jars/lwjgl-openal-3.3.1.jar','./Jars/gdx-freetype-1.11.0.jar','./Jars/gdx-freetype-platform-1.11.0-natives-desktop.jar']

# 不同平台所需的Jar包
Windows=['./Jars/lwjgl-3.3.1-natives-windows.jar','./Jars/lwjgl-glfw-3.3.1-natives-windows.jar','./Jars/lwjgl-opengl-3.3.1-natives-windows.jar','./Jars/lwjgl-openal-3.3.1-natives-windows.jar']
Linux=['./Jars/lwjgl-3.3.3-natives-linux.jar','./Jars/lwjgl-glfw-3.3.3-natives-linux.jar','./Jars/lwjgl-openal-3.3.3-natives-linux.jar','./Jars/lwjgl-opengl-3.3.3-natives-linux.jar']

PLATFORM=Linux
jpype.startJVM(classpath=PLATFORM+BaseJar)# 启动JVM

# 下面的注释可以让编辑器里面的红线消失,看的没那么闹心,不加我记得也是可以运行的。
# noinspection PyUnresolvedReferences
from com.badlogic.gdx.backends.lwjgl3 import Lwjgl3Application, Lwjgl3ApplicationConfiguration
# noinspection PyUnresolvedReferences
from com.badlogic.gdx import ApplicationListener
# noinspection PyUnresolvedReferences
from com.badlogic.gdx.utils import ScreenUtils

@JImplements(ApplicationListener)
class App():
    @JOverride
    def resize(self, width, height):
        pass
    @JOverride
    def pause(self):
        pass
    @JOverride
    def resume(self):
        pass
    @JOverride
    def dispose(self):
        pass
    @JOverride
    def create(self):
        ...#你可以在这里写初始化相关的内容,算是当作__init__吧
    @JOverride
    def render(self):
        ScreenUtils.clear(0,0,0,0)# 清除屏幕

def Main():
    cfg = Lwjgl3ApplicationConfiguration()
    cfg.setForegroundFPS(60)
    cfg.setWindowedMode(800, 600)
    cfg.setTitle("Python x LibGDX")
    cfg.setTransparentFramebuffer(False)
    Lwjgl3Application(App(), cfg)
Main()
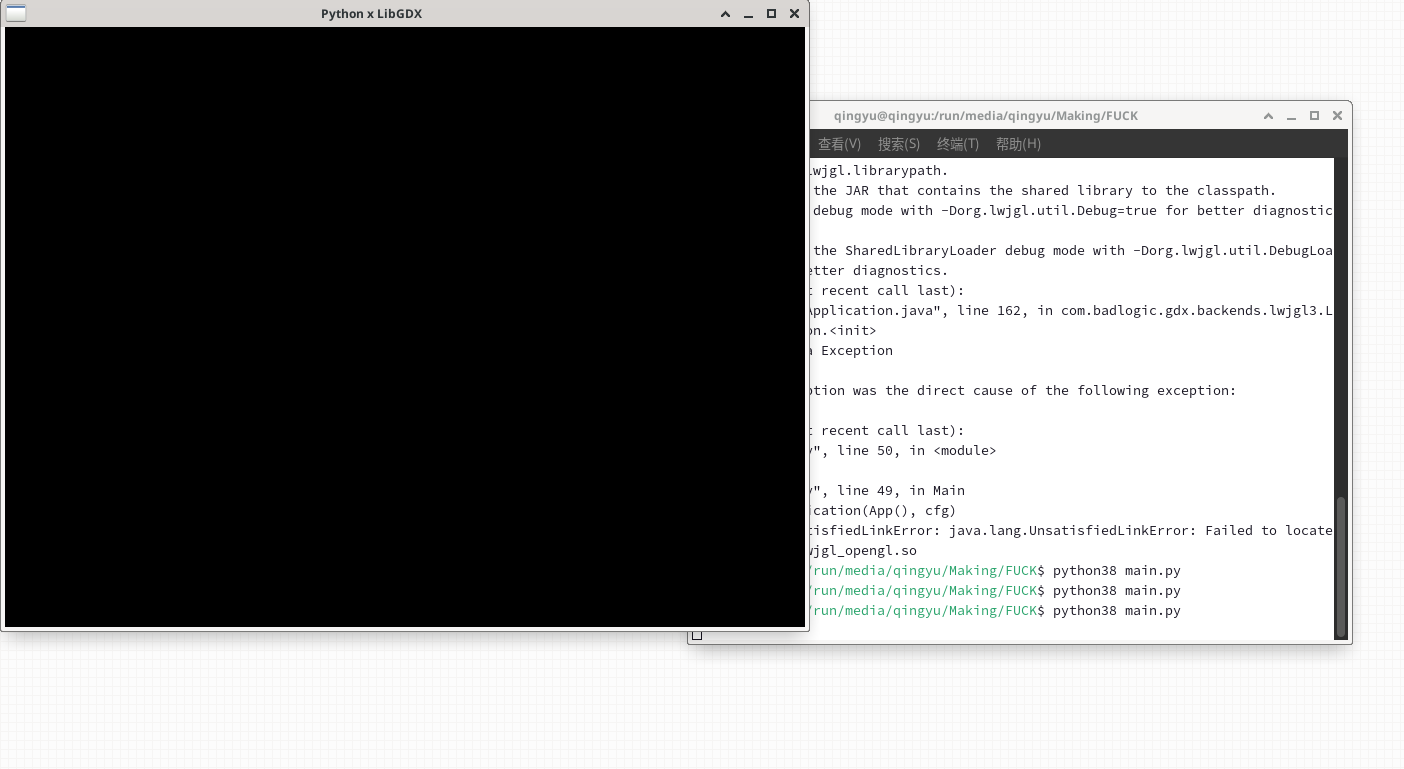
以上的代码理论上可以直接运行,只要你创建的Jars目录名字没错,代码也是写对的,你应该获得一个黑色的窗口。就像这样:
剩下的开发基本上照着LibGDX的文档走就可以了。不过就在我写这篇文章的时候,似乎LibGDX的版本已经更新,有的代码不一样了,比如启动代码。所以本文仅作参考作用。祝愿您在后续的开发中顺利,一遍跑通,没有BUG。